How to Easily Share Files Between Mac and Windows
Table of Contents
Key Takeaways
- You can transfer files between Mac and Windows using native tools if both devices are on the same network.
- Cloud storage services can sync files across devices over the internet, but may incur subscription fees.
- Consider using external drives or free apps like Resilio Sync for occasional file transfers between devices.
Sharing files between a Mac and Windows PC requires no additional software when they’re connected to the same network. In other cases, you may need to explore alternative options, like paying for a cloud storage service. We explore all the methods below.
Use File Sharing to Transfer Files From a Mac to a Windows PC
If your Windows PC and Mac are connected to the same network, it’s relatively easy to set up and start using file sharing on macOS. We’ll break the process into two sections, one for each OS.
Setting Up File Sharing on macOS
Before accessing Mac files from your Windows PC, you need to set up file sharing on your Mac:
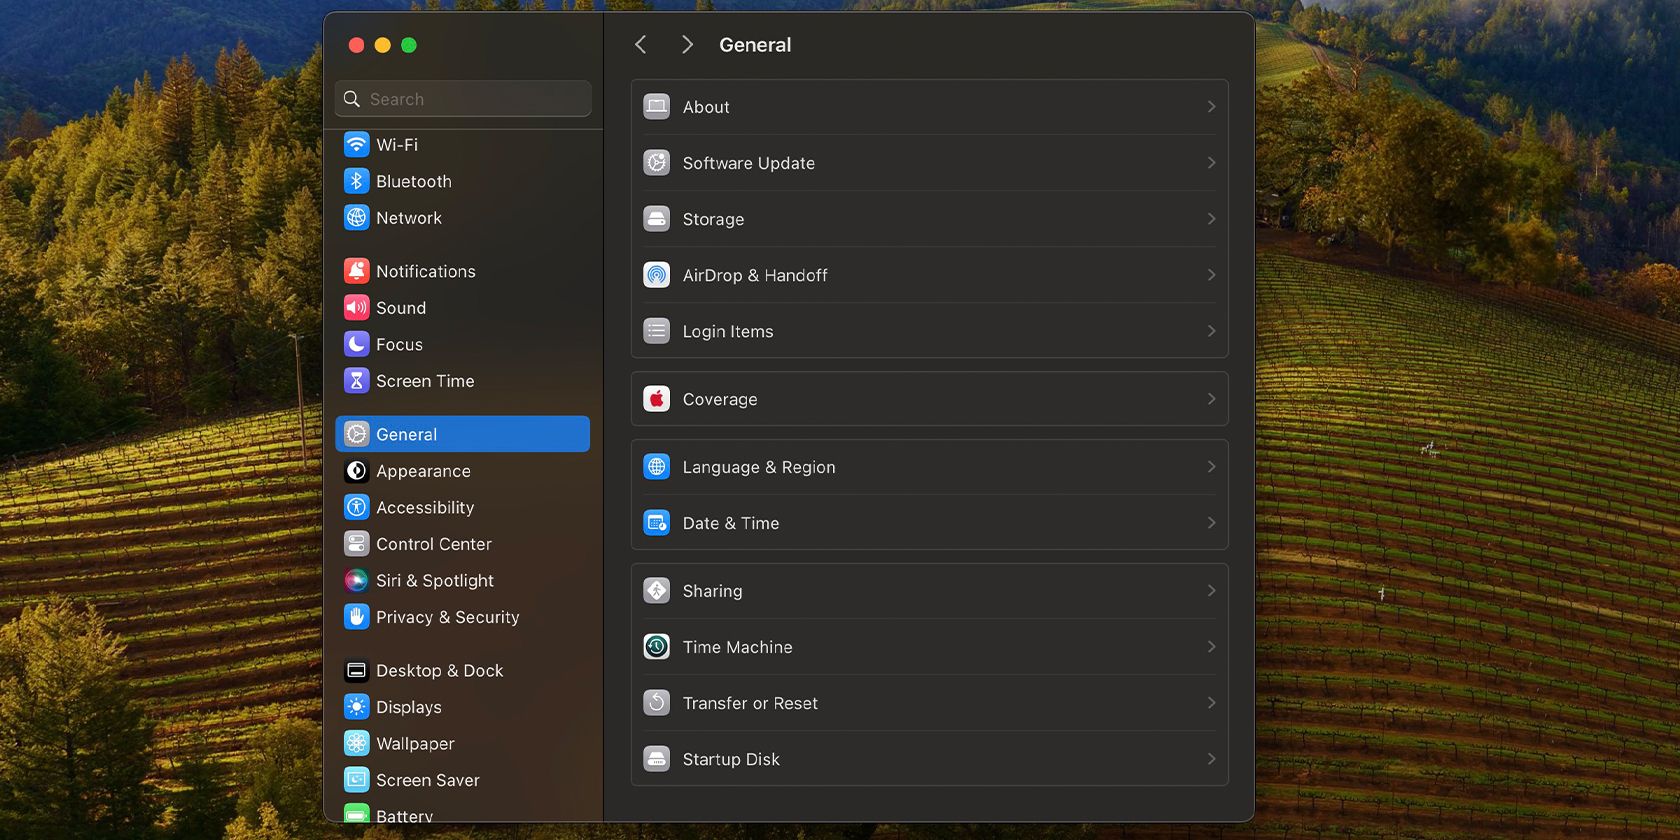
- Open System Settings on your Mac and go to General > Sharing.
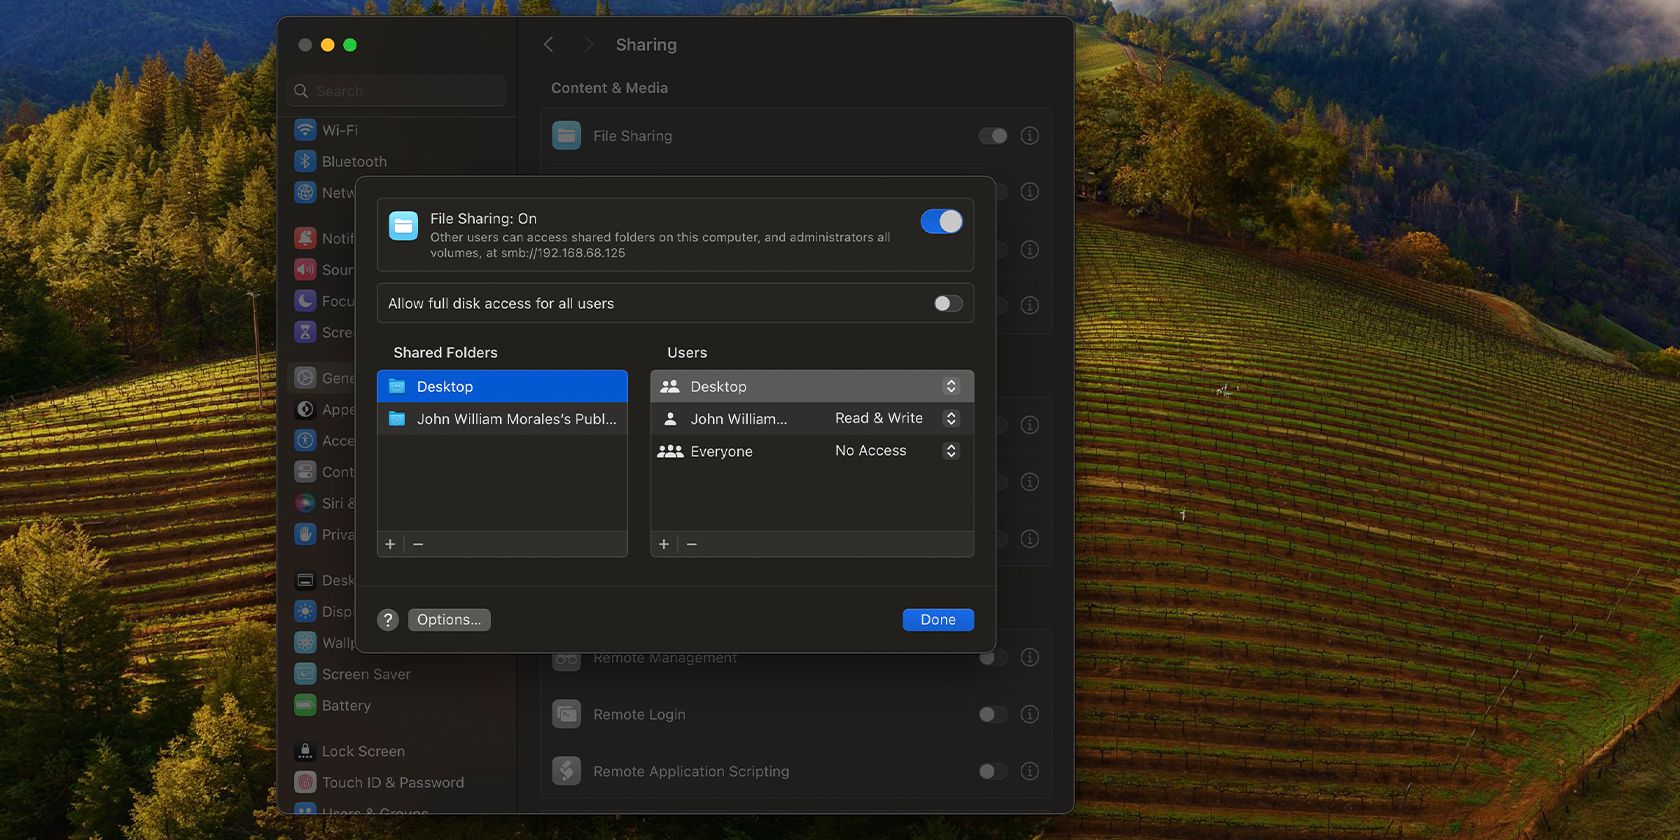
- Toggle on File Sharing and click the Info (i) icon next to the File Sharing toggle.
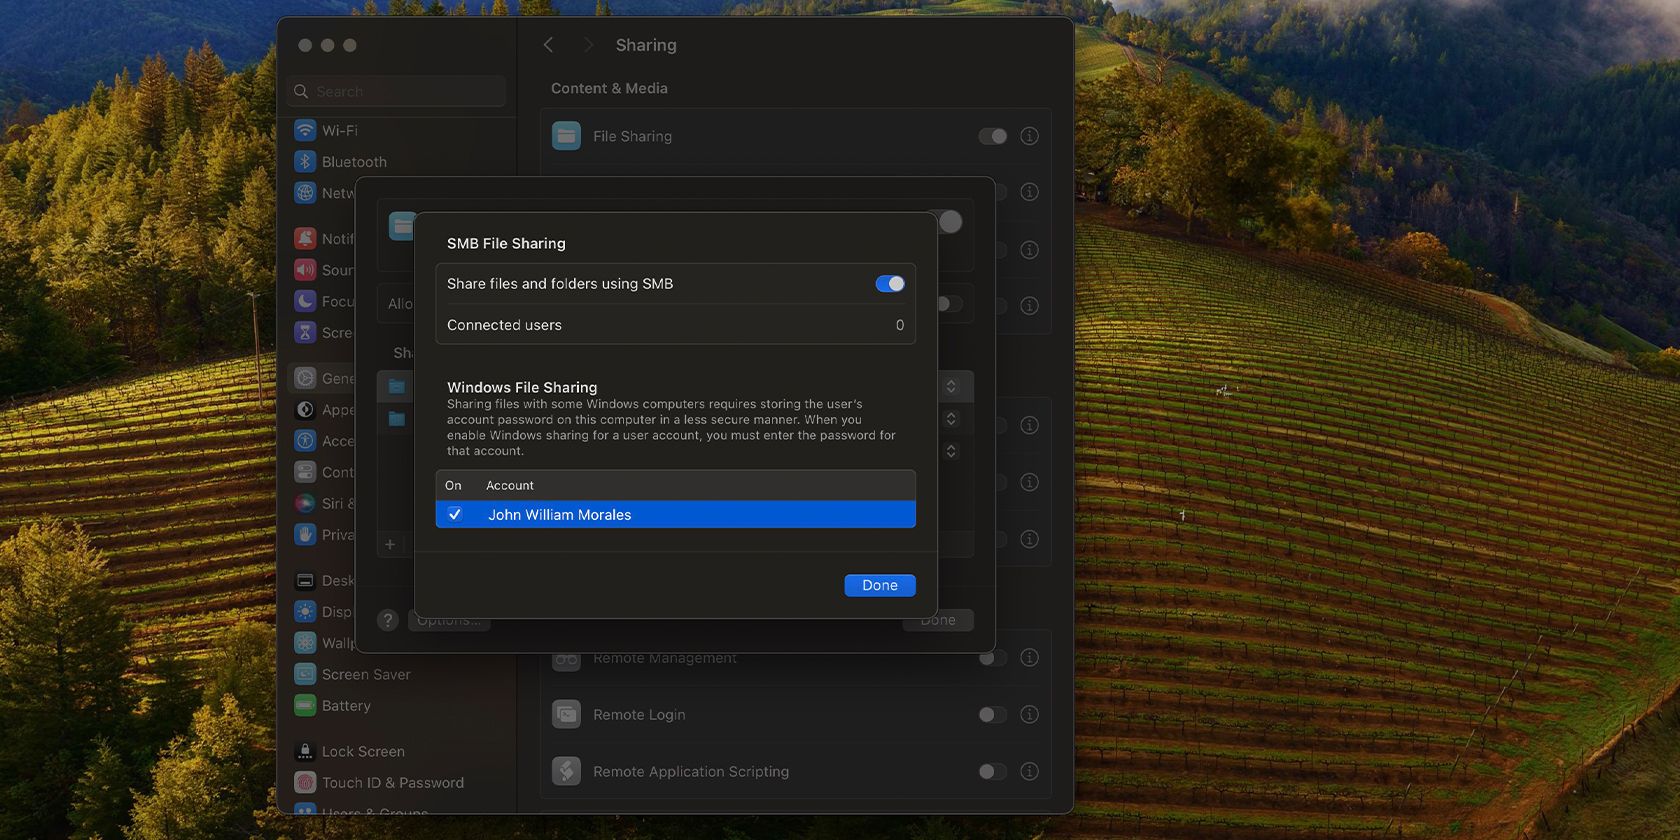
- Click Options to launch the SMB File Sharing window. Toggle on Share files and folders using SMB.
- Under Windows File Sharing, check the box next to the account name whose files you’ll access on Windows. Enter the password for that user and click OK.
- Click Done in the SMB File Sharing window.
- Take note of the IP Address under the File Sharing: On status near the top of the window.
Once you’ve configured file sharing on your Mac, it’s time to jump on your Windows PC.
Accessing Mac Files and Copying Them to Your Windows PC
Follow these instructions to transfer files stored on your Mac to your Windows PC:
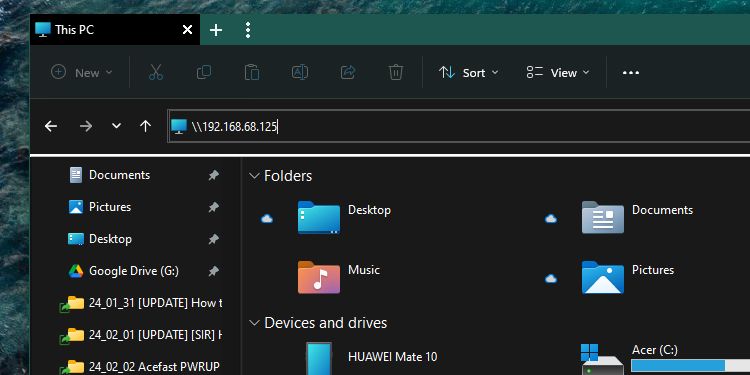
- Open File Explorer on your Windows PC.
- Click inside the address bar and type the IP address from your Mac. Disregard the SMB prefix—the IP address should look like \\192.168.x.x.
- Windows will ask for the username and password for the Mac user’s files you’re accessing. Remember to input them exactly as you did on your Mac.
- You’ll now be able to access the shared folders on your Windows PC. Copy files as you would from any other Windows folder.
If you frequently access these files, you can map the folder as a network drive in Windows to make them easier to open.
Use File Sharing to Transfer Files From a Windows PC to a Mac Using macOS
To access your PC files on your Mac, you need to set up file sharing on Windows first. Again, we’ll split the process into two sections for clarity.
Setting Up File Sharing on Windows
Here’s what you need to do to enable file sharing on Windows:
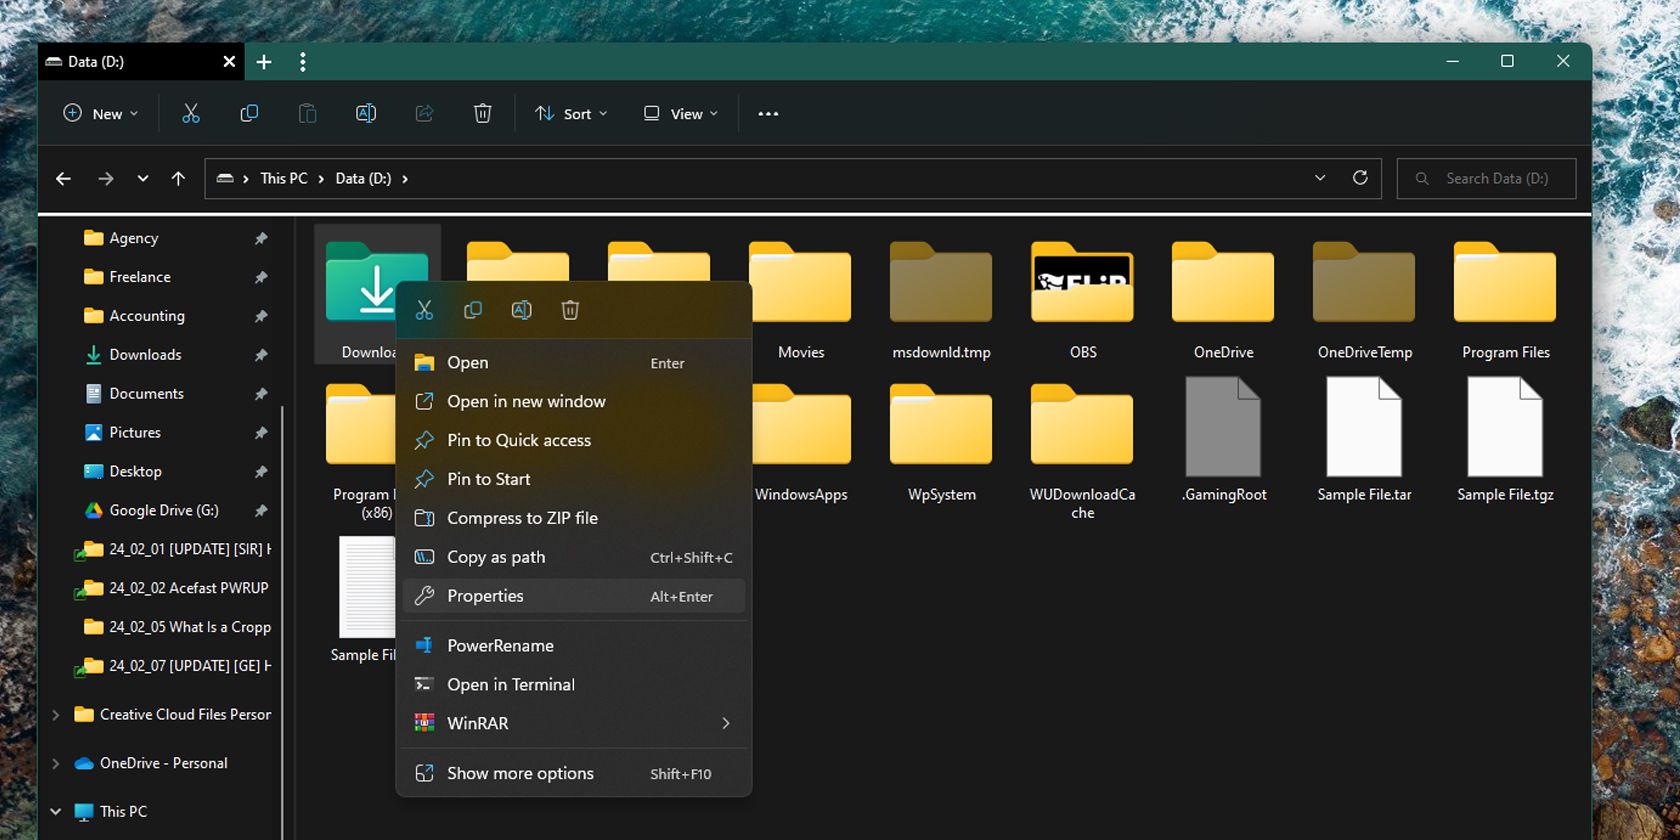
- Navigate to the folder you want to share, right-click it in File Explorer, and choose Properties.
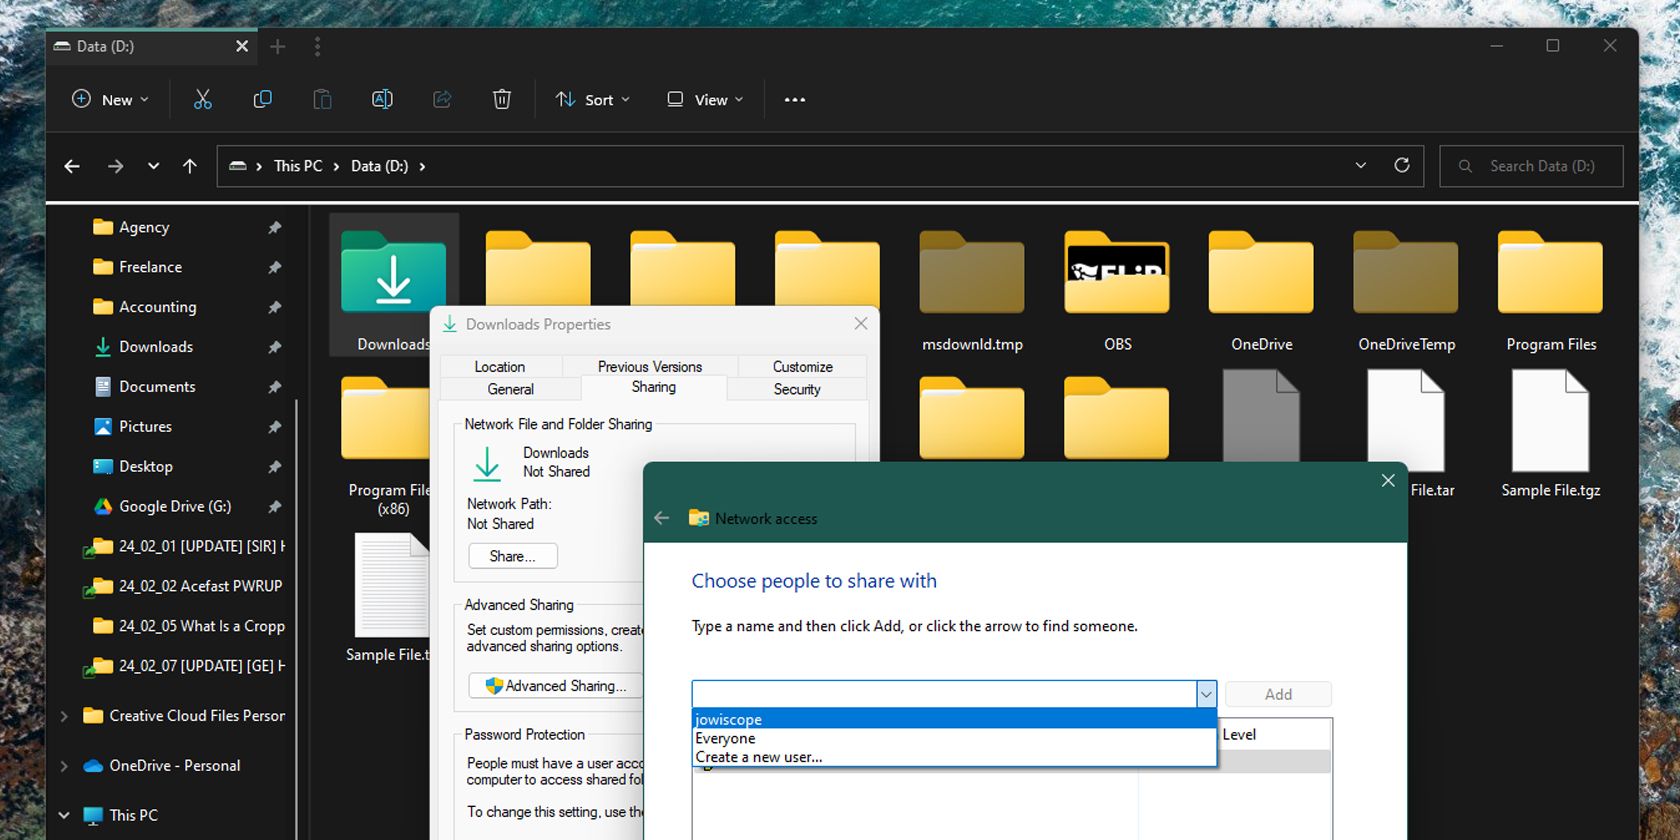
- Head to the Sharing tab in the Properties window and click the Share… button.
- Click the dropdown menu in the new window and select the username you want to share the folder with. Then click Add.
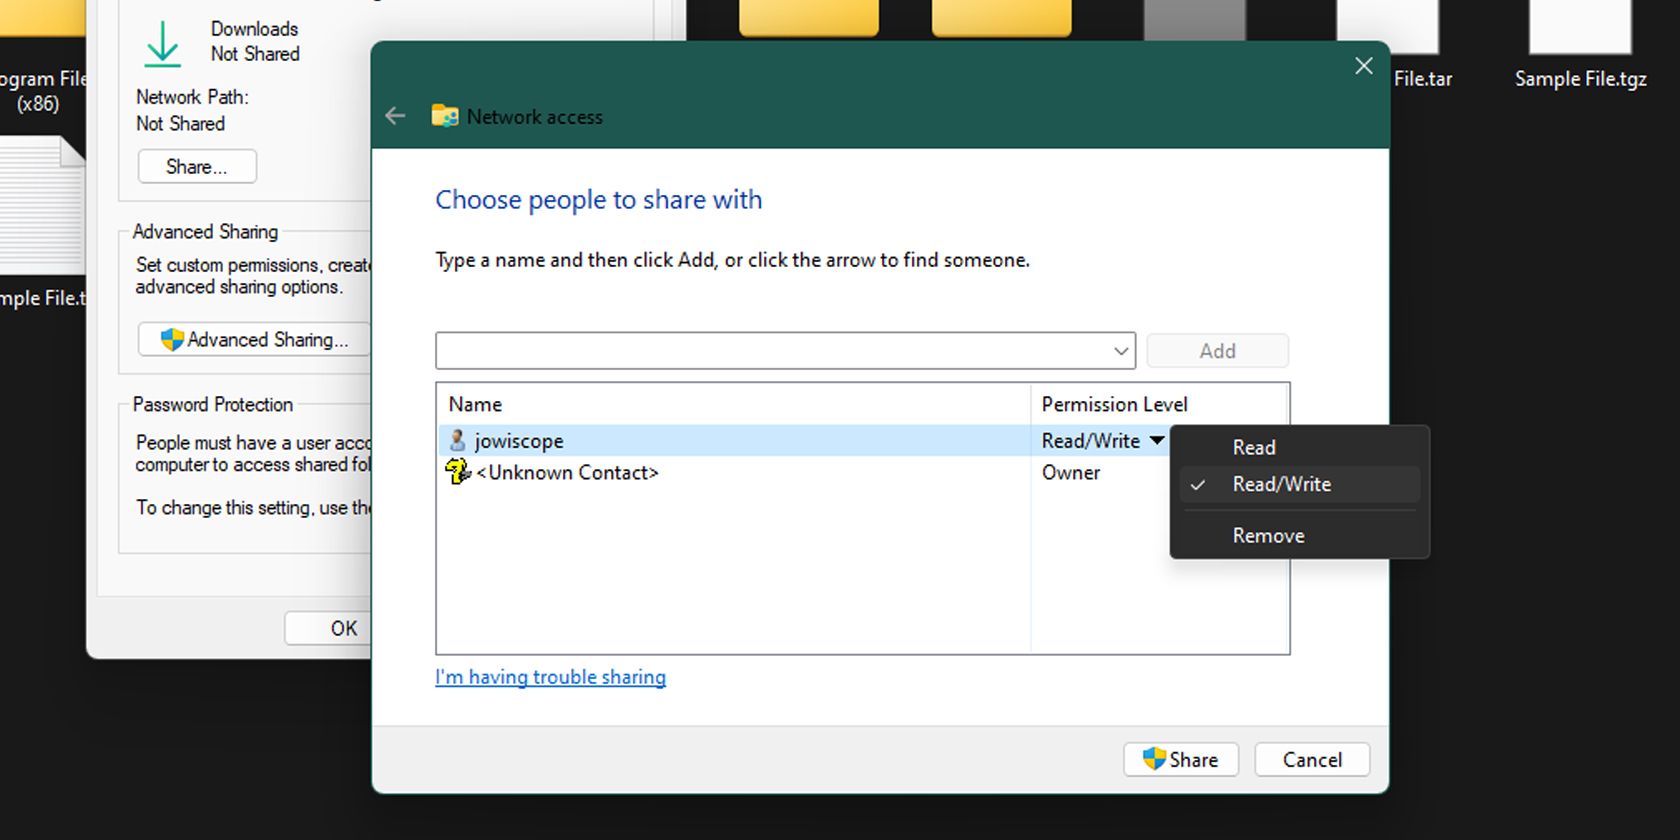
- Click Read under the Permission Level column beside the username to change between Read (access only) or Read/Write (access and make changes).
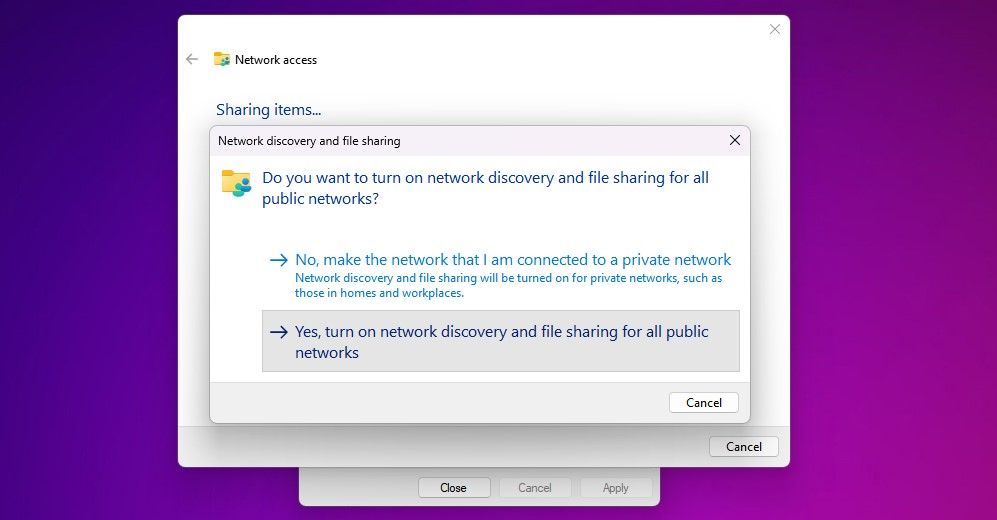
- Click Share. Windows will prompt you to turn on network discovery and file sharing. Select Yes and wait for the process to finish.
- Now, open Command Prompt or PowerShell on Windows, type ipconfig, and hit Enter to find your Windows PC’s IP address and note it down. In most cases, this will be the IPv4 Address under Ethernet or Wireless LAN.
That’s all you need to do on your Windows PC.
Accessing Shared Windows Files on Your Mac
To access the files you just shared on your Windows PC using a Mac that’s connected to the same local network:
- Open a Finder window by clicking the Finder icon in the Dock.
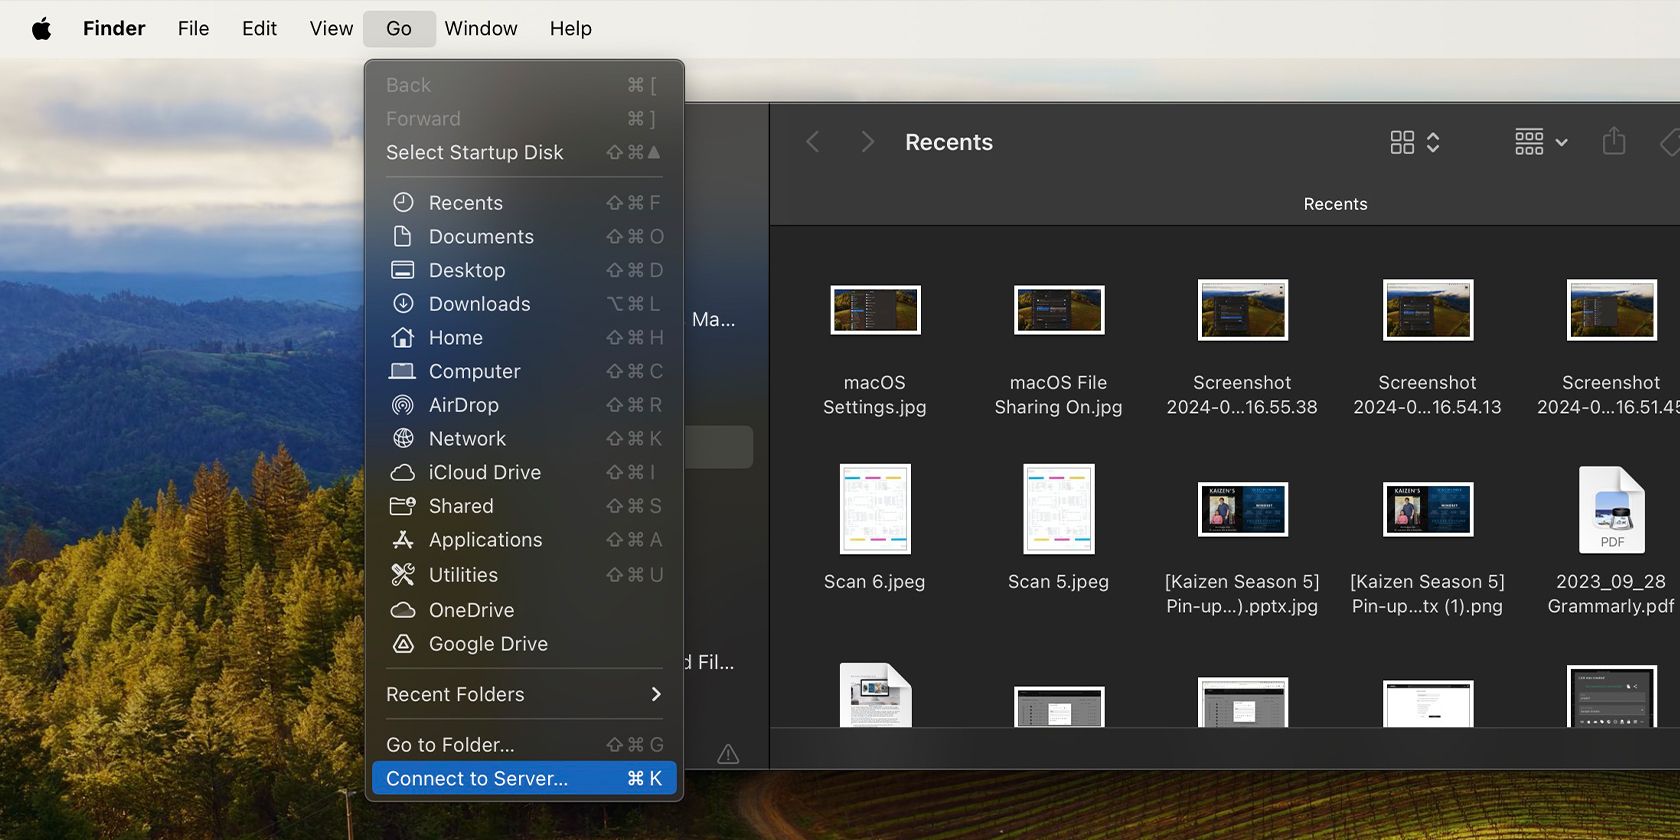
- Click Go > Connect to Server from the menu bar.
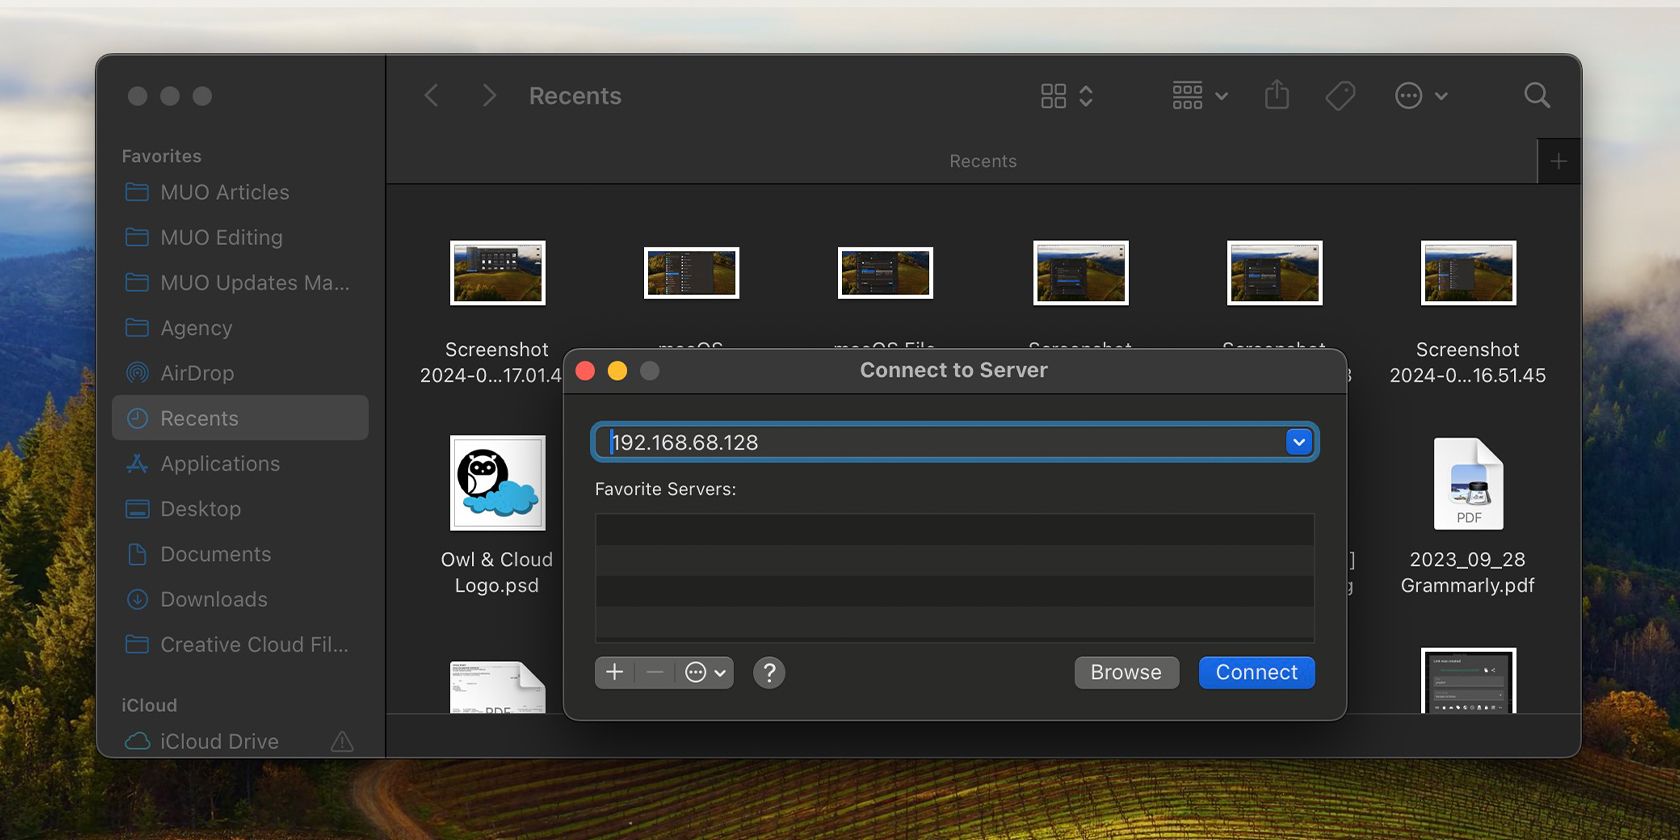
- Type your Windows PC’s IP address in the Server Address field and hit Connect.
- Enter your Windows username and password, then hit the Return key.
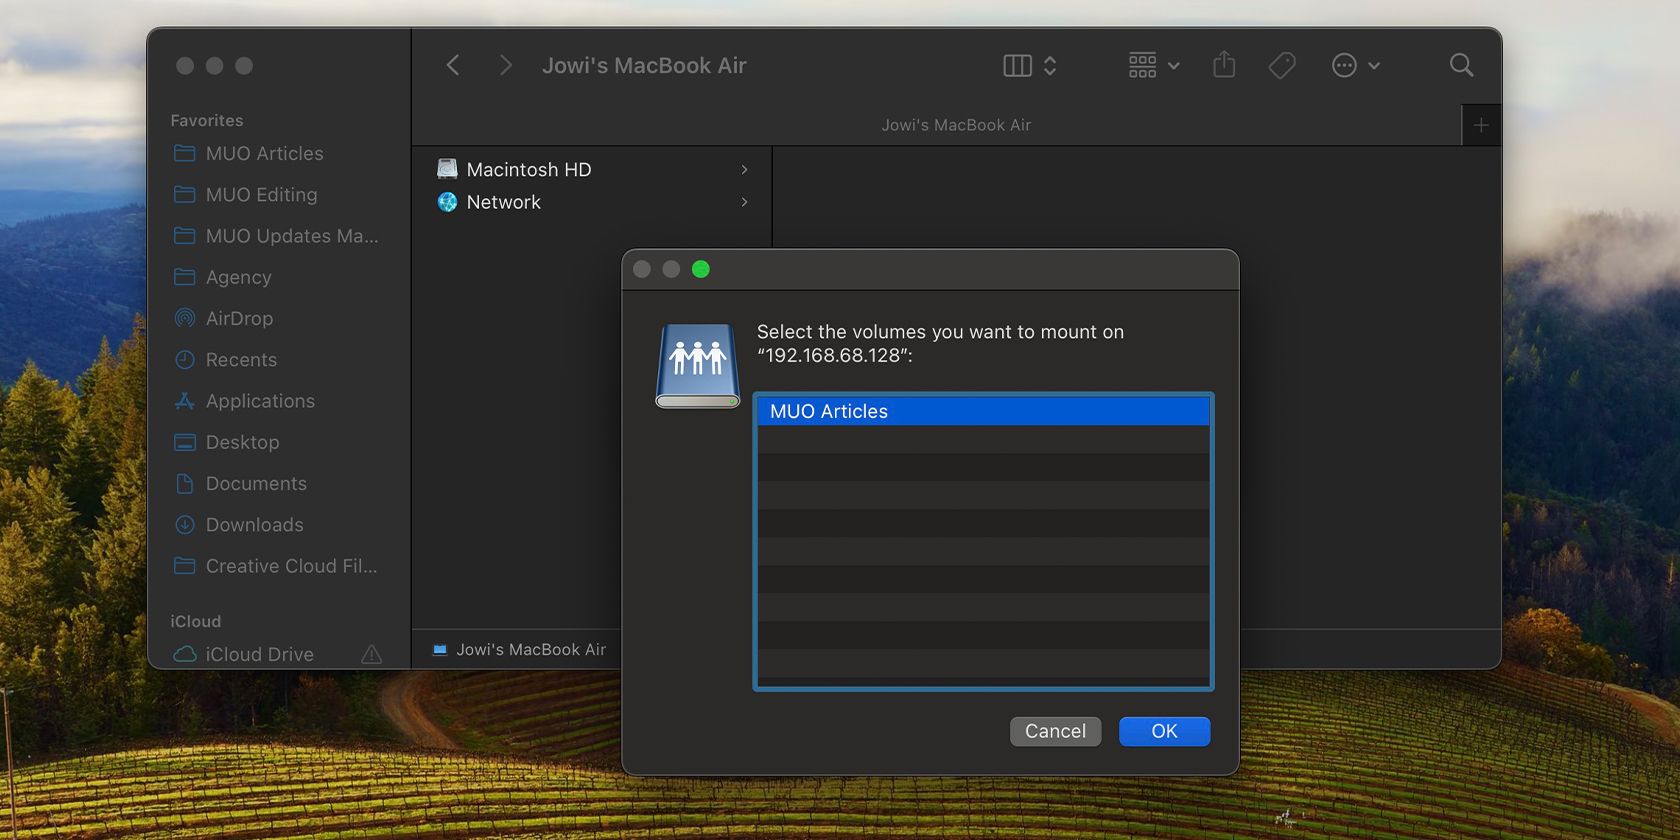
- Select the folder you want to mount on your Mac and click OK.
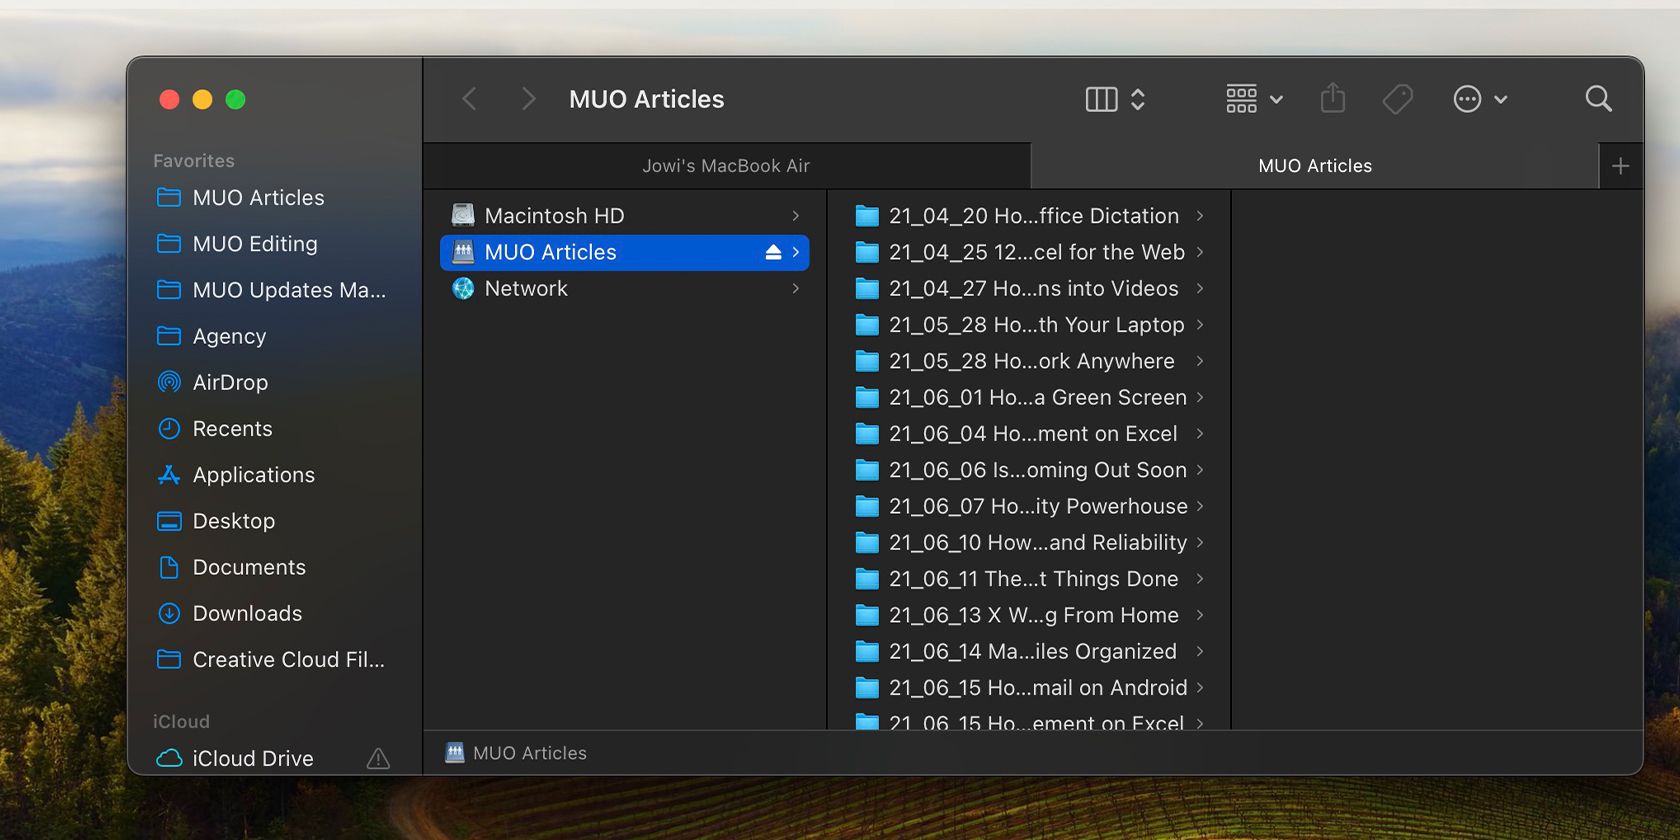
You’ll now see your Windows folders under the Locations section of the Finder sidebar. Now that you’ve connected your Mac and Windows PC, you can easily share more folders.
Other Ways to Share Files Between Mac and Windows
The methods we shared are great if your computers are connected to the same network. But if you want to access files remotely or skip the Windows and Mac setup process, you can use the following alternatives instead.
Use Cloud Storage Services
Cloud storage services like Google Drive and Dropbox store a copy of your files on their servers and let you access them anywhere. You just need to install and set them up on each of your computers so they automatically sync your files.
However, you need an active internet connection to ensure the files are updated. Furthermore, if you want more storage space than what’s offered on the free tiers, you’ll need to pay for a subscription. You also have to wait twice: once for the files to upload from the source machine, and again for them to download on the target PC.
Use a Removable USB Storage Device
This is often the simplest way to transfer files between a Windows PC and a Mac. All you need is an external hard drive or USB stick to copy files to and from your devices.
Remember to format your drive using the exFAT file system, as that’s compatible with Windows and macOS and can accommodate large file sizes. While this won’t let you sync your files in real-time, it’s much easier to use, especially as it’s plug-and-play.
Furthermore, it’s a one-time expense, unlike cloud services that require a subscription. If you plan to go this route, consider the important factors when buying an external drive for your Mac and PC.
Share Files Over the Internet Without Cloud Storage
If you don’t want to spend on cloud storage but still want to access your files remotely, you can try Resilio Sync or Syncthing. These free-to-use apps let you share files between Windows and macOS using an encrypted key.
This is great if you need to transfer large files between devices occasionally. However, you need to keep both devices turned on, and transferring files may take longer if you don’t have a fast and reliable internet connection.
Get a NAS Drive
A Network Attached Storage (NAS) drive is great for keeping files synced across several devices. Consider investing in one if you’re working with a large team or backing up and protecting several large files.
While it may be a bit complicated to set up, and has a high upfront hardware cost, this option is the gold standard for backing up terabytes of data.
Third-party options for copying data between Windows PCs and Macs are great if you need to work on files across devices frequently. But if you occasionally copy and paste files from your Windows PC to your Mac (and vice-versa), the built-in options on both operating systems are more than sufficient for your needs.

